


We have mentioned 7 ways to repair disk errors on Windows 11 in this guide. Some users intermittently face disk errors, while others are locked out of their PCs with “repairing disk errors” appearing on their screen. We have mentioned solutions for all kinds of disk problems here, so we suggest you go through all the sections.
1. Check System Errors in the Disk
1. First, press the Windows 11 keyboard shortcut “Windows + E” to open the File Explorer. Now, right-click on the “C” drive and open “Properties”.
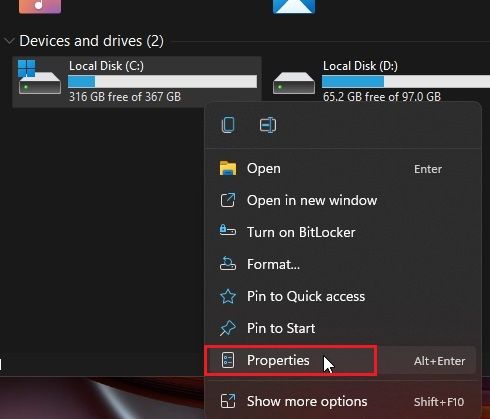
2. Here, move to “Tools” and click on “Check” under “Error checking”.
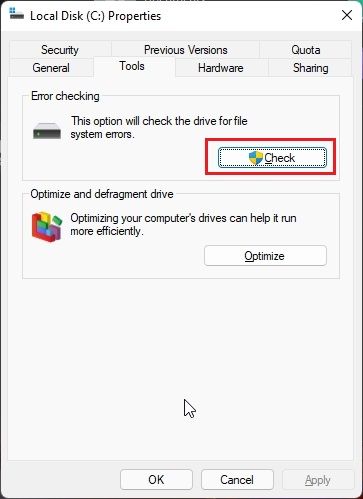
3. Then, click on “Scan drive” in the pop-up window. Windows 11 will now look for system errors in the drive, and if any problem is found, it will allow you to repair the disk.

2. Run CHKDSK Repair Command
If the above method didn’t fix disk errors on Windows 11, follow this method. CHKDSK is Windows’ built-in command-line tool to fix all kinds of disk-related errors. Here is how you can use the CHKDSK repair command:
1. Press the Windows key once and type “cmd”. Now, click on “Run as administrator” in the right-pane to open Command Prompt with admin privileges.

2. Once you are in the CMD window, type the below command and hit Enter. It will inform you that your Windows 11 PC needs a restart to start the CHKDSK scan. Type y and hit Enter.
chkdsk /f C:
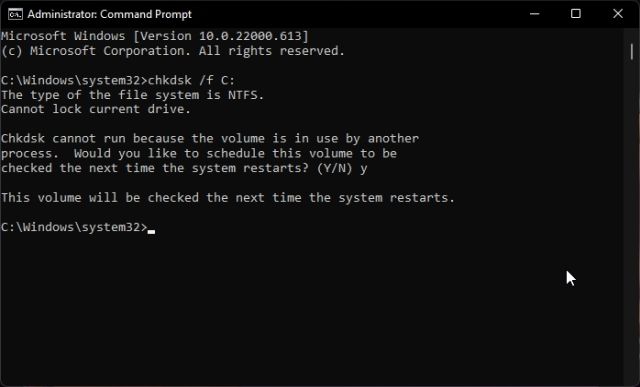
3. Now, go ahead and restart your PC. Windows 11 will run the CHKDSK scan, which may take some time, so keep patience and wait for it to complete.
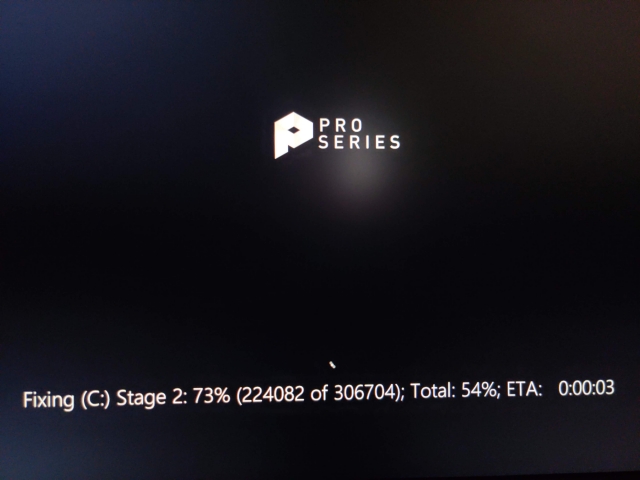
4. After the scan, Windows 11 will boot up automatically. To check the result of the CHKDSK scan, press the Windows key once and search for “Event Viewer“.
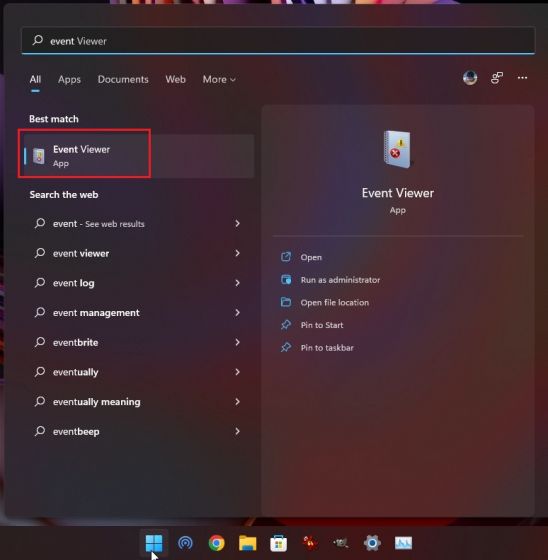
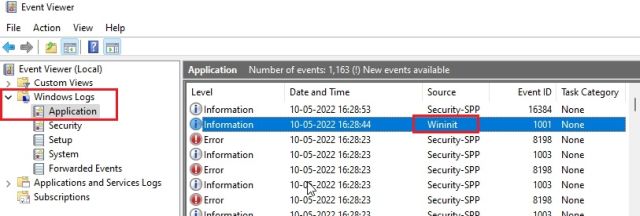
5. Open the Event Viewer, expand the “Windows Logs” section in the left sidebar and move to “Application”. Scroll down and look for the latest “Wininit” entry under the “Source” column in the right pane.
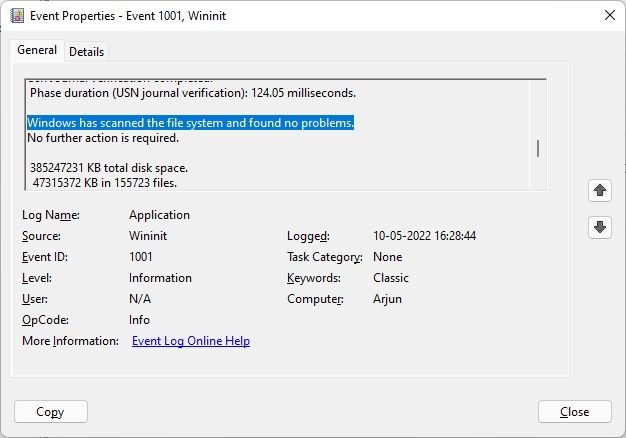
6. Open the “Wininit” entry and review the CHKDSK scan results. If Windows 11 says there are no disk errors, you are good to go. In case it shows disk errors, investigate the error further and look for a solution on the web.
3. Defragment Hard Disk
If you are running Windows 11 on a mechanical hard disk, you can try defragmenting the drive. This fixes most of the basic issues relating to disk errors. That said if you are using an SSD, defragmentation is not recommended. It will reduce your SSD’s lifespan.
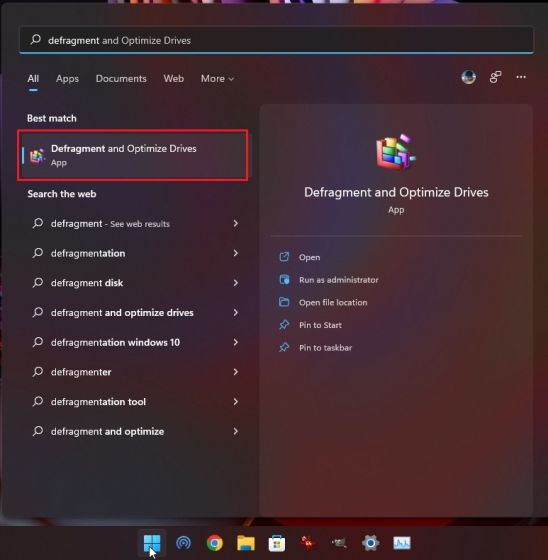
1. Press the Windows key once and search for “defragment“. Now, open “Defragment and Optimize Drives”.
2. Here, select the C drive, click on “Optimize“, and let Windows complete the defragmentation process.
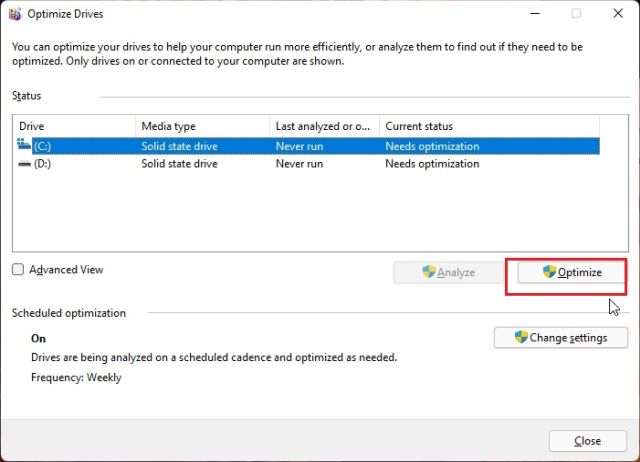
3. After the process is complete, restart Windows 11, and the disk errors should be fixed.
4. Fix Disk Errors in Windows 11 with PowerShell
If you are still facing the “repairing disk errors” issue on Windows 11, try resolving it with PowerShell’s Repair-Volume command. Here is how to use it on Windows 11:
1. Press the Windows key and type “powershell“. Now, click on “Run as administrator” on the right pane to open the window with admin privileges.

2. In the PowerShell window, copy and paste the below command and hit Enter.
Repair-Volume C –OfflineScanAndFix
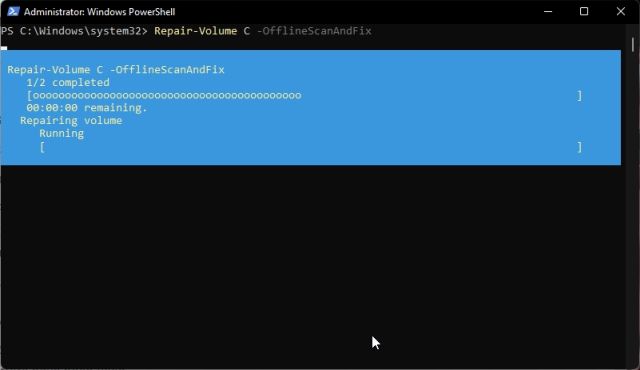
3. After that, run the command mentioned below.
Repair-Volume C –Scan
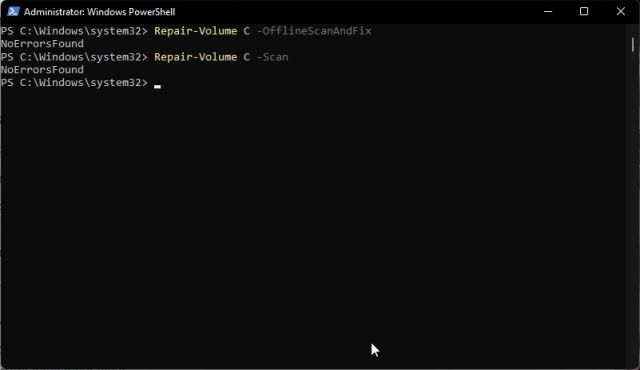
4. Once the repair process is complete, restart Windows 11 and check if disk errors have been resolved or not.
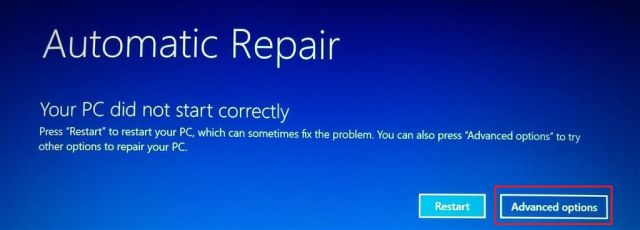
5. Troubleshoot From Recovery (For PCs Unable to Log In)
If you are constantly facing the “Windows detected a hard disk problem” or “Repairing disk errors” problem during boot, you will have to troubleshoot your Windows 11 PC from the recovery screen. Here is how to do it.
1. Before anything, shut down your PC completely. Now, turn it on, and as the Windows loading sign appears, shut down again. Now, turn on your PC and shut it down again. Perform this process 2-3 times, and Windows 11 will be forced to load the recovery screen. On some computers, pressing F2, F8, or F12 during boot also opens the Startup recovery screen, so you can try these keys as well.
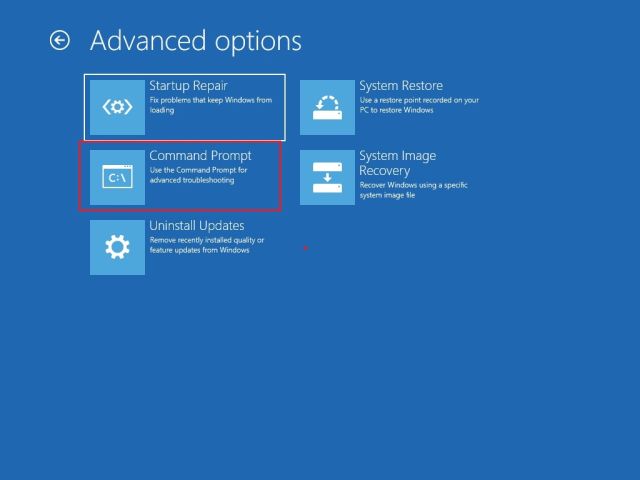
2. You will boot into the Recovery screen right away. Here, click on “Advanced options“.
3. Next, go to “Troubleshoot” and open “Command Prompt“.
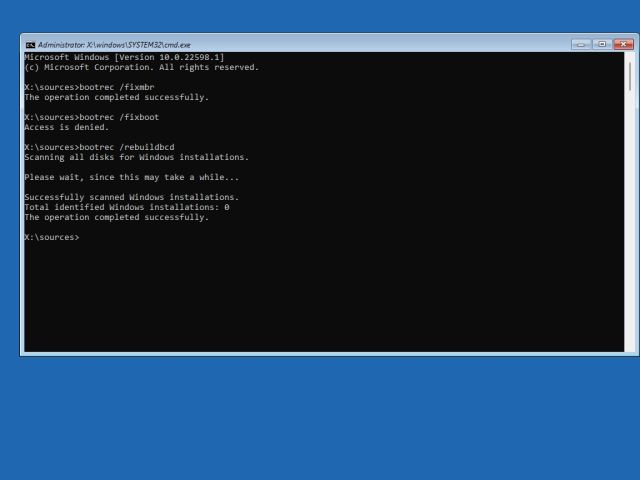
4. A Command Prompt window will now open up. Here, run the below commands one by one. This will try to fix the boot-related files and allow you to log into your Windows 11 PC.
bootrec /fixmbr
bootrec /fixboot
bootrec /rebuildbcd
5. Now, restart your PC and check if the issue has been resolved.
6. Boot to Safe Mode (For PCs Unable to Log In)
If the problem is still unresolved, you will have to boot into the Safe mode and perform some of the operations we have mentioned above. Here are the steps to follow.
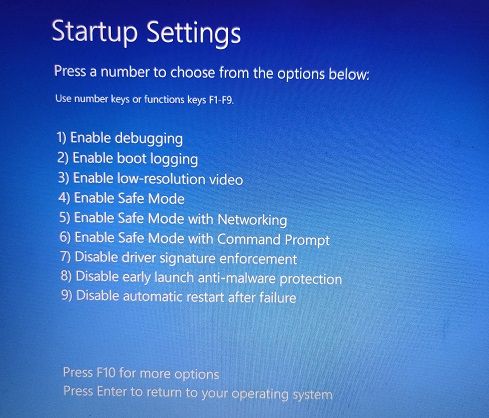
1. To boot into Safe mode, follow our tutorial on how to start Windows 11 in Safe mode. From the recovery screen, press “4” or “F4” to boot into Safe mode.
2. Once you are here, I suggest performing all the operations from method #1 to #4 of this tutorial. First look for system errors in the disk, then run the CHKDSK scan, and after that, defragment the hard disk. Finally, run the PowerShell commands to fix disk-related errors.
3. Now, restart the PC, and hopefully, the disk errors should be gone. You will be able to log into your computer without any repairing disk errors.
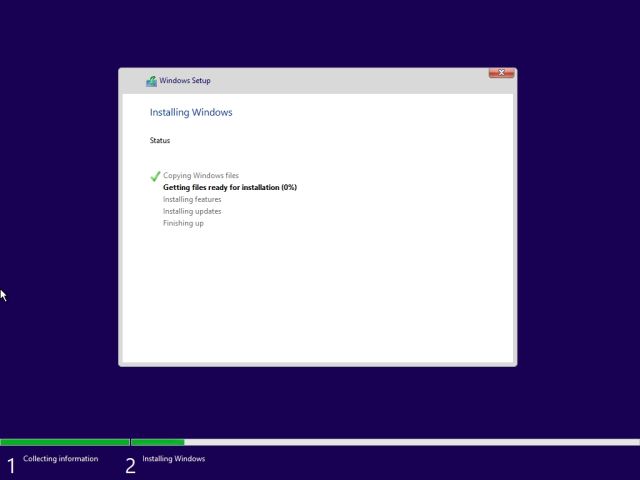
7. Re-install Windows 11 (For PCs Unable to Log In)
If nothing worked so far, your best bet would be to reinstall Windows 11. We have written a handy guide on how to install Windows 11 from a USB drive, so follow it for detailed instructions. Note that this process will wipe just the C drive (which includes the files and folders in Desktop, Downloads, Documents, etc.) and will not affect other drives.
In case, you are still facing disk errors even after re-installing Windows 11, the culprit might be the faulty hard disk itself. We suggest you replace the hard disk with an SSD for much better performance and longevity.
Windows Detected a Hard Disk Problem? Follow these Fixes!
So these are the seven ways you can diagnose disk-related errors on your Windows 11 PC. If you are still able to log into your PC, I suggest looking for errors, fixing them, and backing up data before things get awry with a hard drive failure. Anyway, that is all from us. If you are getting a black screen on Windows 11, we have compiled a number of solutions to fix that issue as well. And if the Windows 11 update is not going through, and you are constantly facing the “Undoing changes made to your computer” error, follow our guide to resolve the problem right away. Finally, if you have any questions about Windows 11 errors or issues, let us know in the comments section below.
Source : BeeBom

![[2019] [UPDATE] KineMaster Pro Mod Apk *Full Unlock* *No Watermark* [Direct Download Link]](https://blogger.googleusercontent.com/img/b/R29vZ2xl/AVvXsEhrt0JKb2HYVKFc3pPyqwkTdTSMwprGUTYbHSldL_eyX_SgcQgf4iS9Z_Y-iIOEJp2TebqgmdEXCTwYP2F3LMELdC2kyp-LRO4b1l50RnGbvplAko-xnaGrLsOotLBbGDQeKpzITLKbxvk/s72-c/Capture.JPG)


No comments:
Post a Comment