
Windows 10 is a beautiful refined working system but it moreover highlights a ton of futile apps that moderate down its execution. One such app is the Photographs app. Beyond any doubt, the Photographs app has a few incredible highlights, but the photo seeing involvement on the app is drowsy and laggy. Furthermore, it needs the crude execution of its forerunner – Windows Photo Watcher. Whereas Windows 10 does come with Windows Photo Watcher included, clients can utilize it to as it were see .TIFF records and nothing else. Natively, Windows does not provide the clients the alternative to set Windows Photo Watcher as their favored photo seeing computer program. Fortunately, there’s a workaround for that.
Restore Windows Photo Viewer in Windows 10
Note: The following procedure requires Administrative Rights, so make sure that you are logged in as a user with administrative privileges.
- To start off, download the Windows Photo Viewer enabler registry file from here.
- Download from here or Try Alternative Download link
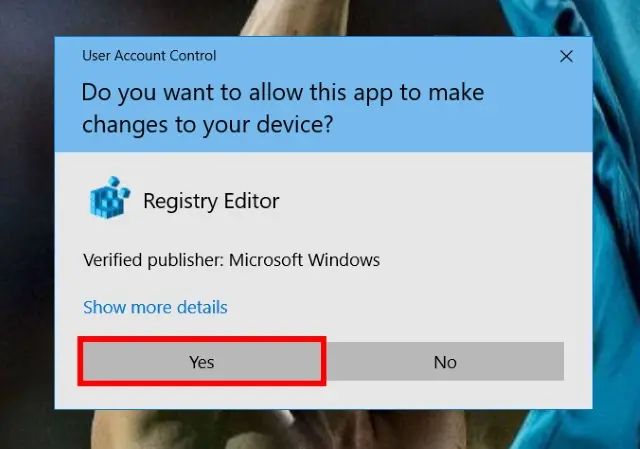
- Once you’ve downloaded the file, double-click it to run it. A User Account Control window will now appear, asking you whether you want to allow the app to make changes to your device. Just click on “Yes” to continue.
- A dialog box will now appear, warning you about adding changes to the Windows registry. Simply click on “Yes” to continue editing your registry file.

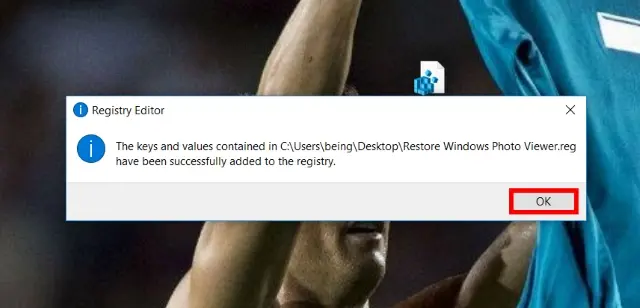
- The program will now proceed in making changes to your registry file. Once completed, it will show a dialog box that all the keys and values have been successfully added to the registry. You can now click on “Ok” to close the window.
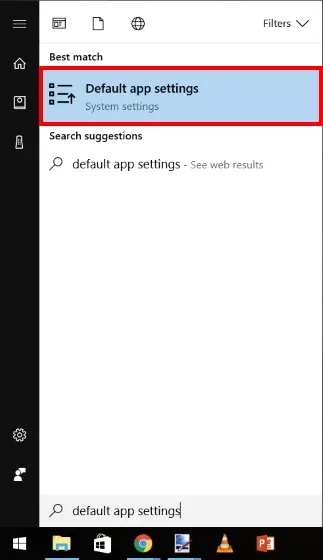
- Next up, open the Start Menu, and type in “Default App Settings” and once the result is displayed, click on it to enter the default apps menu.
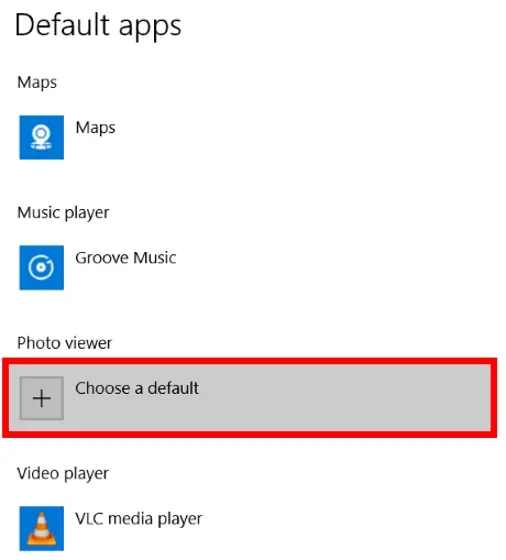
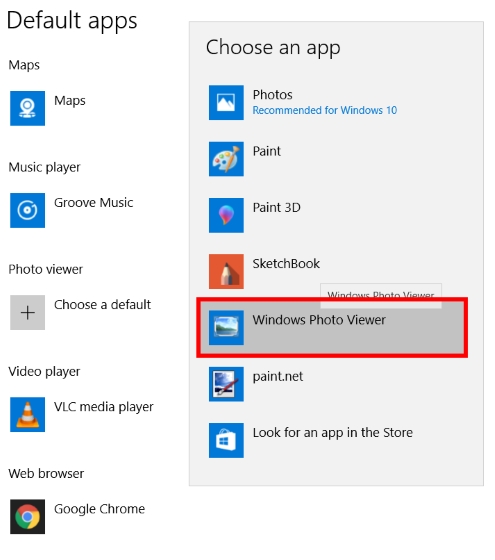
- Once you’re inside the default apps menu, scroll down to the “Photo Viewer” option. Click on the icon that says “Choose a default”. Do note that depending on your previous preferences, a different application might be displayed underneath this option.
- A pop-up menu will now open up. Select “Windows Photo Viewer” from there.
- And that’s it. Windows Photo Viewer is now set as your default photo viewing app. Simply open any photo and it will be opened in Windows Photo Viewer.